How to Wash Dishes Fast: Hand Washing Vs. Dishwasher
Washing dishes is a chore most of us would happily eliminate if we could. However, with some simple tricks and the right techniques, you can cut your dishwashing time significantly while still getting sparkling clean dishes. Read on to discover tips that will have you wondering why you didn’t start washing dishes this way sooner!
This comprehensive guide covers all about how to wash dishes fast and guides about washing dishes comparison between hand washing Vs. Dishwasher. So Let’s start with why learn to wash dishes faster.
Table of Contents
Why Learn to Wash Dishes Faster?
- Saves time – Cut your usual dishwashing time from 30+ minutes down to 15 or less! That’s more time for other priorities.
- Saves effort – Strategic dish arrangements, tools, and methods reduce the elbow grease needed.
- Gets dishes cleaner – Target stuck-on food first and use hot, sudsy water for hygienic results.
- Frees up sink – An organized process avoids a pileup of dirty dishes cluttering the sink as you wash.
- Adds efficiency to your day – Speedy washing leaves you energized to tackle other kitchen tasks.
Supplies You’ll Need
- Dish soap – squirt grease-fighting dish detergent into wash and rinse water to ensure your dishes are properly cleaned, making the task of washing your dishes easier and faster.
- Sponges – Use a soft one for glassware and a tough one for pots and pans.
- Drying rack – A dish rack suspended over the sink speeds drying time.
- Dedicated wash basin – Have an extra dishpan or sink ready just for washing.
- Hot water – Heating the water makes grease dissolve faster.
- Cold rinse water – Using cold rinse water as a final step not only firms up proteins and starches for spotless dishware but also makes washing your dishes faster and easier.
- Clean towels – Dry hand-washed items with soft, lint-free towels.
Best Practices for Faster Dishwashing

Follow these methods every time you wash dishes to develop an efficient system.
Presoak the Most Soiled Items
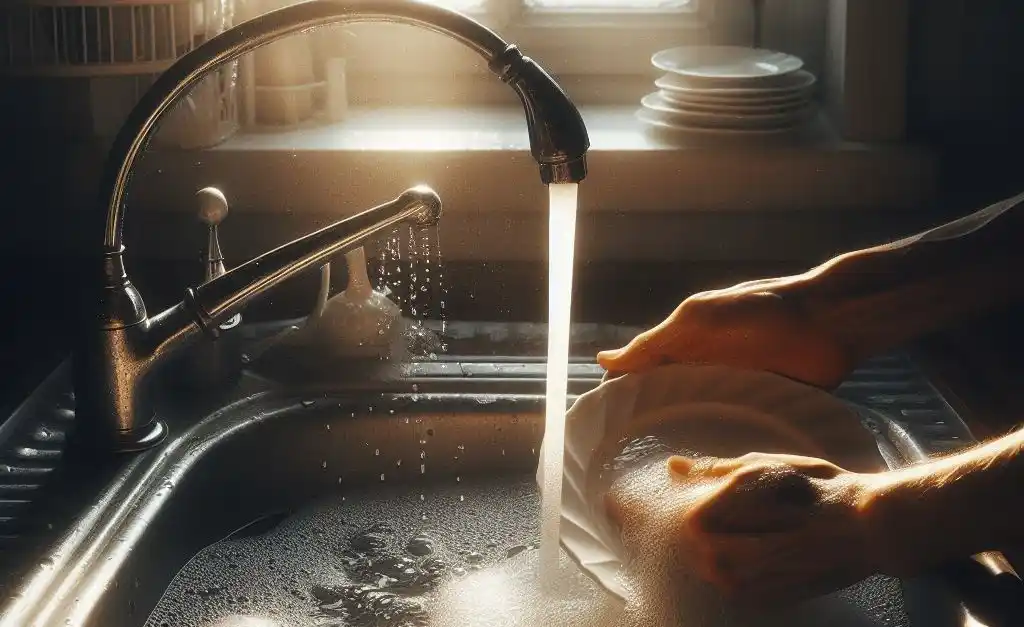
Pots, pans, and serving platters often have dried or burnt-on food particles that require extra attention. Start by filling the sink with hot, soapy water and submerging these dirty items first. Let them soak while you wash other dishes. This loosens stubborn food so it wipes away easily when you get to the soaking items.
Arrange Dishes Strategically
Think through the tips and tricks of when to wash certain dishware as you set up your workspace for washing the dishes. Group together items needing the same washing temperature. Place the least dirty dishes nearby to grab first. Set out your soap, sponge, dish rack, and towels for easy access as you clean.
Wash Glasses First
Delicate glassware without heavy soil can be washed quickly by hand. Instead of plunging your dishes directly into hot sudsy water first, use cold water to make it an easier and faster process. This method not only allows other items to soak while standing up fragile glassware in the drying rack early on, it also makes washing your dishes right, faster, and easier.
Target Flatware Next
Utensils and silverware typically do not have dried-on food particles so they can be washed next. Use a divided utensil basket or dishpan section to corral flatware as you wash. Arrange the handles up in the dish rack so the water rolls off, which is an effective way to dry your dishes.
Don’t Rinse After Washing
Skipping the rinse cycle in between washing each item saves minutes of time. Let soapy dishes pile up neatly in the rack, then do one final hot rinse of everything at the end. This “delayed rinsing” approach prevents you from rinsing dishes multiple times unnecessarily.
Wash Inner Surfaces Too
Use a dish wand brush to scrub inside mugs, glasses, pots, bowls, and pitchers as you wash.food and beverages leave residue you can’t see on inner surfaces over time. Regularly scrubbing these areas makes your dishes fresher longer between deep cleans and ensures your dishes actually stay clean.
Time-Saving Tools
- Dishwand brush – Great for scrubbing inside containers and silverware baskets.
- Gloves – Protect skin from getting dry and irritated.
- Scrubbing pads – Help remove baked-on casserole, grease, etc.
- Adjustable holder – Clamps onto sink edge for sponges and brushes to air dry.
- Drainboard rack – Fits across a double sink to dry washed items.
Hand Washing Vs. Dishwasher
While automatic dishwashers are convenient helpers, hand washing is often faster for small loads. However, there are pros and cons to both methods.
Benefits of Hand Washing Dishes
- Faster for small loads – Fewer dishes can be washed in about 10 minutes.
- More eco-friendly – Uses less water than running a machine with partial loads.
- Better for lightly soiled items – Delicates come cleaner with a gentle hand wash.
- Immediate availability after meals – Items don’t have to wait in the machine.
- More budget-friendly – No special equipment needed.
Benefits of Using the Dishwasher
- Handles larger loads well – Holds full service for 12+ people.
- Cleans heavily soiled dishes – Power spray blasts off baked/burned food.
- Sanitizes at high heat – this method kills 99% of bacteria and germs on your serving dishes.
- Frees up your time – Just load and walk away until finished.
- Less strain on your hands – No need to stand at the sink scrubbing.
Step-By-Step Guide For How To Wash Dishes Fast

Follow this sequence, along with the tips sprinkled throughout, for minimal time at the sink.
Stage 1: Set Up Your Dish Station
Make dishwashing a breeze by gathering everything you need and arranging your workspace.
- Fill dishpan(s)/sink with hot, soapy wash water.
- Place a soft sponge, dish soap, brush wand, and scrub pad nearby.
- Set out dish rack, drain board, and linen towels for drying.
- Put heavily soiled pots, pans, and platters to soak first.
Stage 2: Wash & Rinse Delicate Glassware First
Gently wash wine glasses, tumblers, and drinkware since they are less dirty.
- Submerge glassware to soak briefly and loosen soil from surfaces.
- Use a soft sponge and gentle swirl motion to clean delicate items.
- Stand glasses and mugs up in the dish rack rather than laying flat so they dry faster.
Stage 3: Flatware and Silverware
After meals, utensils typically just have grease or food film left on them, by washing these dishes right away, you can prevent stubborn build-ups.
- Use plenty of hot, soapy water in a Silverware basket or separate pan just for flatware.
- Agitate knives, forks, and spoons with the dish wand brush to lift residue from crevices.
- Arrange utensils handle-up in dish rack sections so water rolls off instead of puddling.
Stage 4: Lightly Soiled Dishes
Bowls, smaller plates, and other dishware with only a light film of food are next.
- Check the bottoms of plates and bowls for crumbs before washing – a quick rinse or wipe clears any debris away.
- Wash the front and back of plates using a soft dish sponge and hot, soapy water.
- Stack similar items, like small plates or saucers, together neatly in the dish rack.
Stage 5: Heavily Soiled Pots and Pans
By now, your cooking pans have soaked long enough to tackle that baked-on food.
- Use an abrasive sponge or scrub pad on tough grease and food soil.
- Allow more contact time for stubborn soil by letting suds sit a few moments before rinsing.
- For burnt areas, rub gently with a paste of baking soda and water before washing.
- Set larger items in the rack to drain and air dry instead of towel drying to save effort.
Stage 6: Miscellaneous Serving Pieces
Now for big platters, prep bowls, pie dishes and other serving items.
- Check for burnt or stuck bits in baking dishes – a rinse or soak loosens these.
- Use a dish wand, bottle brush, or sponge inside pitchers, carafes, vases.
- Arrange larger items so air circulates all around and undersides.
Stage 7: Final Hot Rinse
One last bath in hot clean water leaves everything sparkling before drying.
- Fill the dishpan with hot clean water for doing one final rinse at the end.
- Rinse glasses first, then silverware, ending with dirtiest pots and pans.
- Rather than wiping each piece, allow to air dry in the rack fully. The heat helps evaporate any lingering water droplets faster than towel drying.
Stage 8: Unload & Inspect Dishes Before Putting Away
- Feel dishes to ensure bone is dry – moisture causes hidden bacterial growth.
- Visually check for streaks or film – shine a light at an angle to see any residue.
- Rewash problem pieces if needed – it happens to everyone occasionally.
And that’s it – just repeat this streamlined process each time to transform a tedious task into a time-saving, efficient habit!
Top Tips for Getting Dishes Clean Fast
Use any of these extra tricks during your dishwashing routine to save even more time and effort.
- Squirt dish soap directly into a scrub pad or sponge instead of the water each time. This puts suds right where you need them for scrubbing. Just be sure to rinse thoroughly since soap residue can cause film buildup on dishes over time.
- Attach a plastic holder with a built-in soap dish to the sink rim for convenient access to brushes and sponges as you wash. Bonus tip: Store scrub pads in the soap dish slots too for fast grabbing mid-wash.
- Use flat plastic pans that fit inside sinks and dishpans during washing. The shallow bins allow you to carry stacked groups of cups, dishware, or utensils easily to the drying rack.
- Get a split sink basin insert if you don’t already have a double sink. The divider creates dedicated wash and rinse sides to quickly plunge washed items into fresh hot rinse water.
- Try a sturdy drying rack that fits over, rather than inside, the sink basin. The suspended design holds more dishes while allowing sink access for washing the next batch underneath.
- Use a magnetic strip knife holder attached to the wall or backsplash when hand washing knives. Letting blades drip dry into the empty sink prevents accidents and dulling of sharp edges.
- Install an adjustable faucet nozzle to switch between strong spray for rinsing and wide dispersal for filling pans and basins while washing. Look for one with options for pulsating shower stream, center spray, or full spread flow settings.
- Hang a wire or mesh drain rack across a double kitchen sink rather than setting dishes inside to dry. Air circulates better, excess water drips right into the sink, and you reclaim basin space for washing.
- Line the basin you use for rinsing with a non-slip mesh mat. The gripped bottom keeps lightweight plastic items from floating out of position as you plunge them up and down during the final rinse stage.
Dishwashing Help for Families & Roommates
Washing dishes for just yourself or two people is vastly different than tackling meal cleanup for families or groups of roommates. But teamwork helps! Establish these habits for making post-meal dishwashing and drying duty go more smoothly when multiple people pitch in.
- Assign washing and drying roles – Especially helpful for kids aged 10+ to begin practicing. Assign tasks based on the height and skills of each person. Have one wash and rinse while the other dries just-washed pieces immediately so they don’t sit wet waiting.
- Conveyor method – Set up a triage station using dish racks, drain boards, linen towels, and counters. Each person takes a task – washing, first rinses/drying, second drying/inspecting, putting away dishware. This assembly line approach helps large households.
- Batch system – One person scrapes dishes and loads them directly into an empty dishwasher after each meal for families generating full loads daily. Run the machine nightly so clean dishes are ready for the next meal’s cleanup.
- Scheduled duty roster Post a calendar with dishwashing assignments on the refrigerator for the week as seen in a Washington Post article, ensuring everyone contributes fairly. Consider abilities (can younger kids even reach the sink safely?) and reasonable time estimates when planning.
- Incentivize helping in washing the dishes to make it a communal effort. – Offer perks like staying up 15 minutes later on school nights or first dibs on dessert to kids who help without complaining. Praise roommates who pitch in with washing the dishes so it doesn’t fall on just one overwhelmed person, this serves to create a supportive environment.
- Communicate needs clearly – If the drying helper falls behind, speak up respectfully so the washer knows to pause instead of assuming the situation. Coordinate tasks verbally since not everyone can see each other’s roles well.
- Make sure kids wash properly – Set clear expectations on scrubbing thoroughly before you inspect and put dishes away. Show them examples of how you define clean enough to meet safety standards. Provide constructive feedback to help inexperienced helpers learn the right techniques.
Washing dishes faster takes some adjustments but pays off hugely in time savings and reducing effort once you find an efficient system. By following this comprehensive guide full of tips and tricks tailored to your household size and appliances, you will find washing your dishes to be a simplified task. Soon you’ll breeze through this chore feeling energized rather than drained! Let us know if you discover any other speedy dishwashing hacks not mentioned here.
FAQs About Washing Dishes Quickly
What is the fastest way to wash dishes by hand?
- Working in an organized sequence washing least-soiled to most-soiled items saves time.
- Using delayed rinsing instead of washing and rinsing individually cuts steps.
- Arranging items handled up so water drains faster helps them dry quicker.
- Warming wash and rinse water along with degreasing dish soap breaks up food soils faster with less scrubbing needed.
What water temperature should I use to hand wash dishes?
Use hot water at a temperature comfortable for your hands, around 115° to 125° F, for washing dishes effectively. Hot water melts grease on cookware faster plus helps dissolve and lift food residue from dishware better. Use cool water for the final rinse since heat can dry out and cause spots.
How can I get my family to help with dishes faster?
- Make dishwashing fun by playing music, challenging to beat a timer, taking turns choosing podcasts to listen to.
- Use teamwork by having an assembly line system of roles – washing, rising, drying, putting away.
- Offer small rewards or privileges for kids who help without complaining or rushing through.
- Lead by example and rinse your own dishes before loading into the dishwasher after meals.
Is hand washing or a dishwasher more sanitary?
While high-heat dishwasher cycles kill more bacteria, hand washing can also effectively destroy germs and viruses when done properly in hot sudsy water. Be sure to use antibacterial dish soap and wash all surfaces thoroughly with a soft brush. Air drying is the most hygienic way to finish since towels can spread illness-causing pathogens.
In Summary
Now that you’ve learned the fundamentals of blazing through dish duty, it’s time to start practicing this smarter dishwashing sequence. Review the key takeaways:
- Prep your workflow by gathering all needed supplies first.
- Start with the least dirty and delicate glassware.
- Target flatware then lightly soiled dishes next before heavily soiled pots and pans.
- Allow lengthy presoaking for burnt food to lift easily later.
- Use both gentle and tough sponges/brushes as needed per item.
- Take advantage of time-saving specialty tools.
- Delay rinsing after washing stacks until the final stage.
- Get help from household or roommates by assigning washing/drying roles.
- Follow fundamental cleaning guidelines for safety and hygiene.
What stress-reducing or timesaving dish tricks can you suggest? Share your top efficiency hacks once you implement this faster washing system at home!


